Getting started
You need to register to add a listing. It is free to register. If you have logged in before, you’ll be taken to your Profile page. On the main menu, see Add A Listing > List Now to post.
Listing fields explained
1️⃣ Listing Type – The “Listing Type” matches the payment package for the listing you’ll publish. It’s important to choose the correct type for your listing because different information is shown to visitors automatically.
For attractions that are both paid and free to visitors (such as an optional entry fee) choose “Paid Attraction”. For recurring events such as markets, use “Free Attraction”.
For one-off or yearly events such as a music festival, use “Event or Festival”.
4️⃣ Category – Select a category for your listing. Multiple categories can be set. The default category determines the icon seen on the map. If you choose multiple categories, your listing will appear in search results for any of those categories.
5️⃣ Website – Add the link to where you want your visitors to book. You can use your direct-booking website, Airbnb link, or your business website, such as a cafe or hotel. Your link must start with https://. Then, use your site name without the www. For example: https://mysite.co.nz.

2️⃣ Title – Enter a title for the listing, it is used throughout the site.
3️⃣ Description – Enter around 200 words as a description for the listing. You can’t copy anyone else’s work, but you can use Chatgpt or other AI tools to rewrite it. That makes it unique and useable on this site. You can add headings and subheadings to make your text more engaging.
6️⃣ Tags – Tags are words that people might use to find what they’re looking for. Add up to 20 Tags, separated by commas, to help your listing be found in Google search. Examples are: Apartment, Spa pool, playground, cafe, hotel, etc.

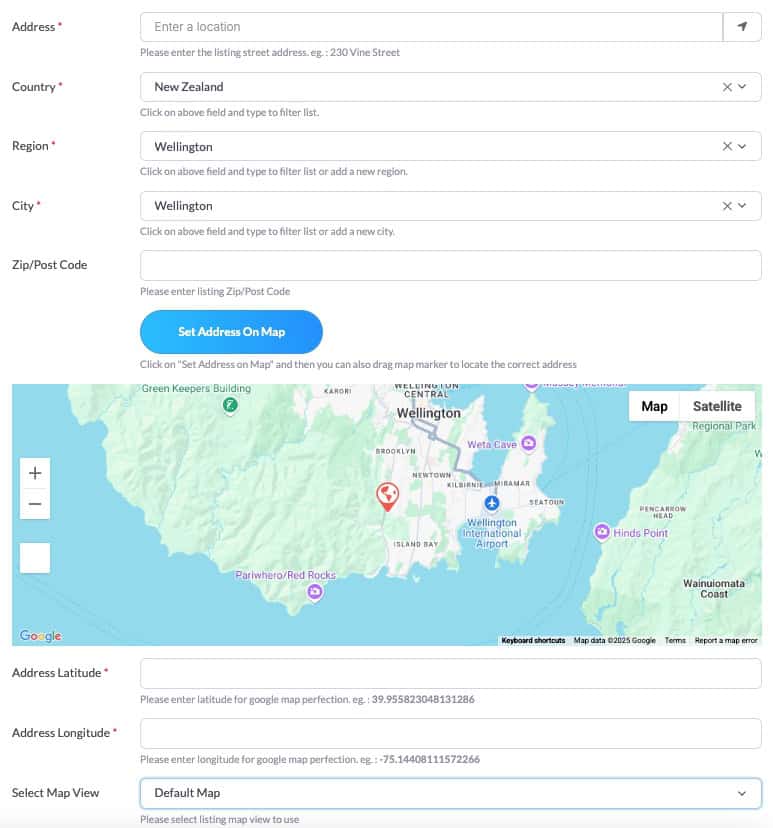
6️⃣ Address – There are several convenient ways to set the address for a listing. If an address is typed in the address field, select the correct one from the dropdown list. Doing one of the following will auto-set the correct info for all the address fields.
- Drag the map to the desired position.
- Drag the map marker to the desired position.
- Enter the address and then click Set Address on map. This will try to set the correct map position.
- Clicking the My Location icon in the street address field will work if you are currently at the location you wish to add.

Changes to the Map View have no effect on what is shown on the site.
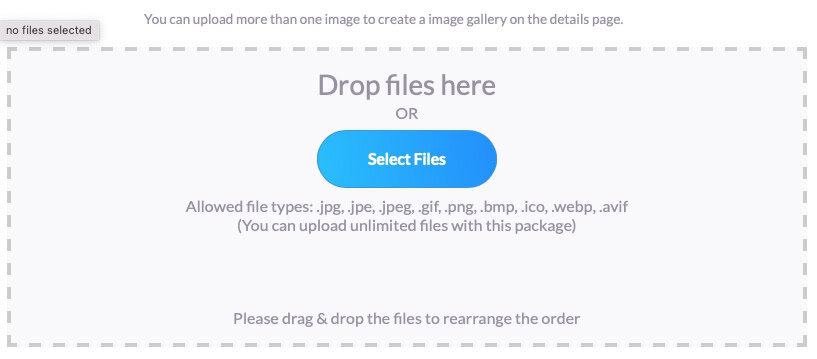
7️⃣ Images – You can add up to 9 images to your listing by choosing them from a file (click “Select”), or dragging them into the image uploading area. Drag them to rearrange the order. The first image is used as the main (top) image. Images are automatically centred, so if an image doesn’t look good, choose another size or layout. For best display results, choose large file sizes (screenshots will be fuzzy) and JPG or Jpeg file types. Images are automatically resized.
For best Search Engine Optimization (SEO), rename the files with a sensible name before uploading them. For example, rename the photo of your BnB’s kitchen as “yourbnbname-kitchen.jpeg”.
iPhone images must be saved as .jpeg or .JPG before being uploaded. Web browsers can’t read .HEIC files.

7️⃣ Phone and Email – Add the contact details that you want visitors to use to contact you. These are displayed on Business listings only.
7️⃣ Business Hours – If you have a business listing, share your opening hours here (click “Yes” to start. You can update them anytime. The timezone is set for all of New Zealand automatically and doesn’t need to be changed.
7️⃣ Special Offers – These are displayed on Business listings.


