A step-by-step guide for hikers, trail managers, and adventure planners
Whether you’re mapping out a weekend hike, sharing a route with your running club, or building a resource for a local park, Google My Maps is one of the most powerful — and completely free — tools available for creating shareable trail maps. Unlike the standard Google Maps app, My Maps lets you draw custom routes, drop waypoints, add photos, organise multiple layers, and publish your map for anyone to explore. Once published, visitors can interact with the map directly—zooming in on terrain, checking distances, viewing photos, and exploring points of interest.
In this guide, we’ll walk you through the entire process from opening a blank map to publishing a polished trail guide. No technical experience required — just a Google account and a sense of adventure.
Step 1: Open Google My Maps
Choose either:
- (simplest) Visit mymaps.google.com, sign in with your Google account, and click the large red “+ Create a New Map” button in the top-left corner.
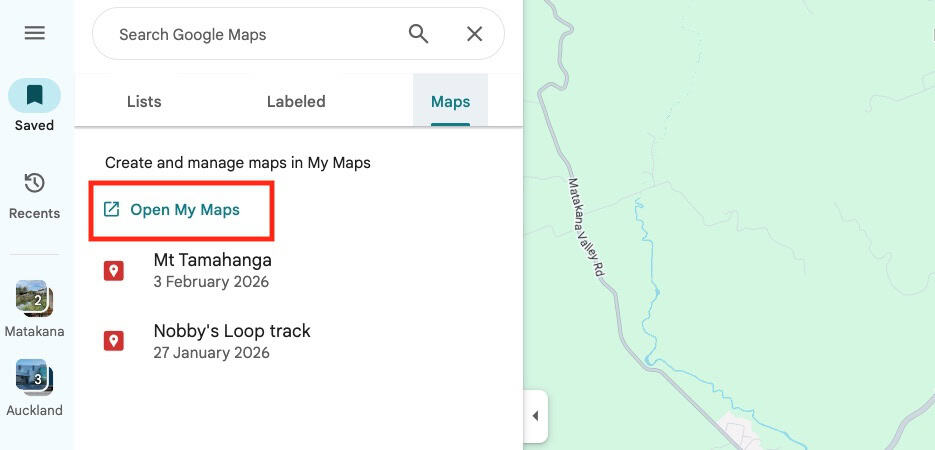
- open your Google browser (shown below) and open Maps.
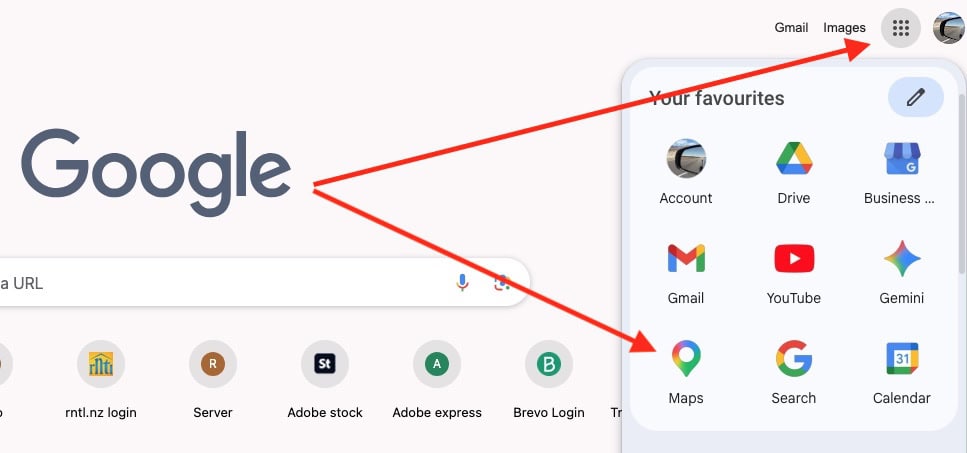
Then click “Open My Maps”, which opens a blank canvas built on top of a standard Google Maps base layer that you can annotate however you like.
Give your map a meaningful title straight away by clicking “Untitled map” at the top of the sidebar. Something like “Mount Eden Loop Trail” works perfectly. Add a short description so anyone who finds your map knows what to expect — difficulty level, approximate distance, and the best season to visit are always useful details to include.
Step 2: Choose Your Base Map Style
Before you start drawing, choose a base map that suits the terrain. Click the “Base map” dropdown at the bottom of the layers panel. For hiking trails, the Terrain option is usually the best choice — it displays elevation shading, contour lines, and natural features like rivers and ridgelines that are invaluable for route planning. If you’re mapping an urban trail through a city park, the standard Map or Satellite view might serve you better. You can switch base maps at any time, so don’t worry about locking yourself in early.
Step 3: Add Layers to Organise Your Map
Layers are one of My Maps’ most powerful features. Think of them as transparent overlays stacked on top of your base map — each one holds its own set of markers, lines, and shapes. For a trail map, a clean structure might look like this:
- Layer 1 — Main Trail Route: the primary path drawn as a line
- Layer 2 — Key Landmarks: trailhead, summit, viewpoints, water sources
- Layer 3 — Facilities: toilets, car parks, picnic areas
Click “Add layer” in the sidebar to create each one, and double-click the layer name to rename it. You can toggle layers on and off, which is especially useful when sharing the map with different audiences who may only need certain information.
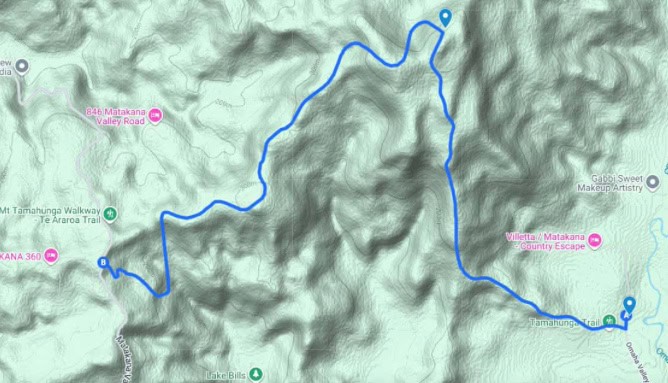
Step 4: Draw Your Trail Route
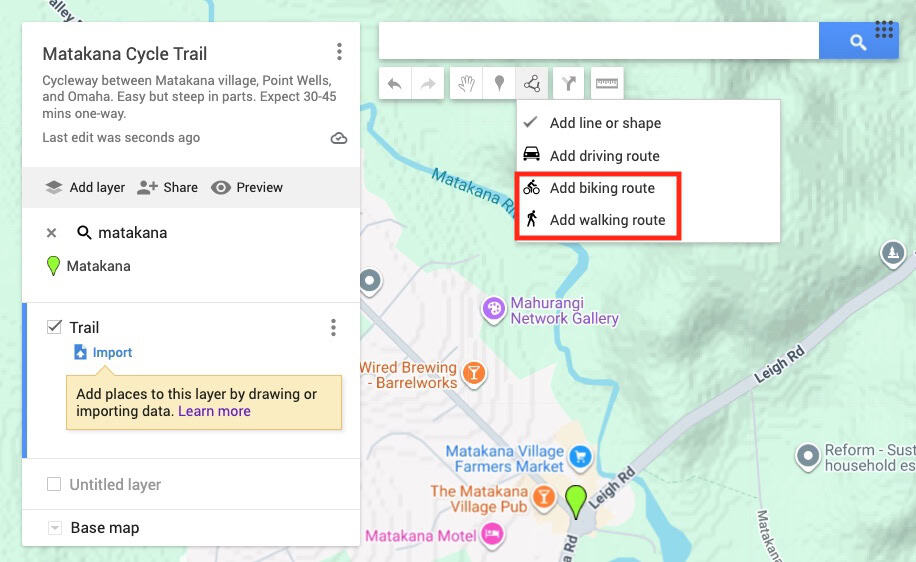
This is the heart of the whole process. Select your Trail Route layer, then click the draw a line tool in the toolbar — it looks like a small zigzag icon. Choose “Add biking route” or “Add walking route” from the dropdown menu.
Follow along your trail path on the map and the route is created automatically. Click at waypoints to drop an anchor point.
Alternatively, choose “Add a line or shape” and click along the route. For winding switchbacks or tight curves, click frequently to keep the line accurate.
When you’ve traced the full route, double-click to finish. A sidebar panel will appear where you can name the route, write a description, and add useful details like estimated walking time. Pro tip: zoom into satellite view while drawing so you can follow actual footpaths with precision, then switch back to terrain view when you’re done.
Step 5: Add Markers for Key Points
Switch to your Landmarks layer and use the Add marker tool — the pin icon — to drop points of interest along the trail. Click any location on the map, then fill in a name and brief description. Useful markers to include are the trailhead and car park, the summit or high point, scenic lookouts, stream crossings or water sources, and any hazard or navigation notes.

Customise each marker’s colour and icon by clicking the paint bucket icon in the marker popup. Using consistent colour coding — green for safe spots, yellow for caution areas, blue for water — makes your map much easier to read at a glance. You can also attach photos to any marker, which is a great way to help hikers confirm they’ve found the right starting point.
Step 6: Style Your Trail Line
A bold, well-coloured trail line makes the route stand out clearly against the base map. Click on your trail line, then click the style icon in the info panel. Choose a colour that contrasts well with the terrain — bright orange or red works beautifully against green backgrounds. You can also adjust the line thickness; a width of 3 to 4 pixels is usually ideal for readability.
If your trail has multiple segments with different difficulty ratings, draw each segment as a separate line and colour-code them. Green for easy, blue for moderate, black for difficult. This technique is borrowed directly from ski resort maps and works brilliantly for hiking trails too.
Step 7: Share and Publish Your Map
Click the Preview button — the eye icon — to see exactly how your map looks to other users. Check that all markers display correctly, the trail line is visible and clear, and layer names make sense to someone unfamiliar with the area. Once you’re satisfied, click Share and adjust the visibility settings to Public.
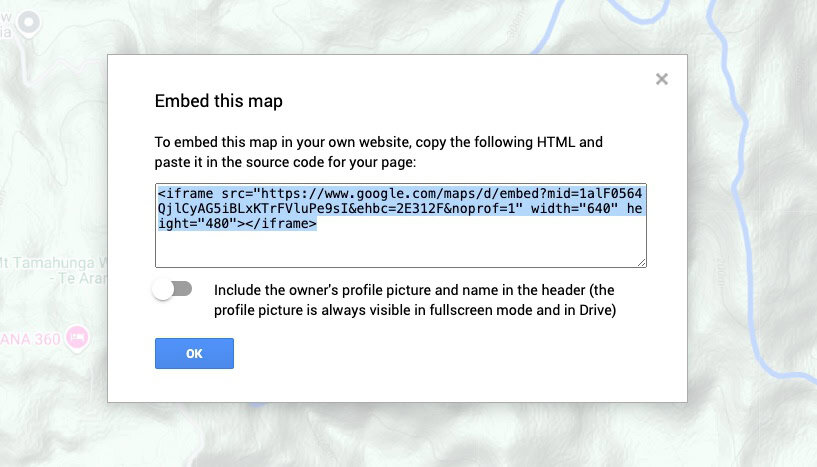
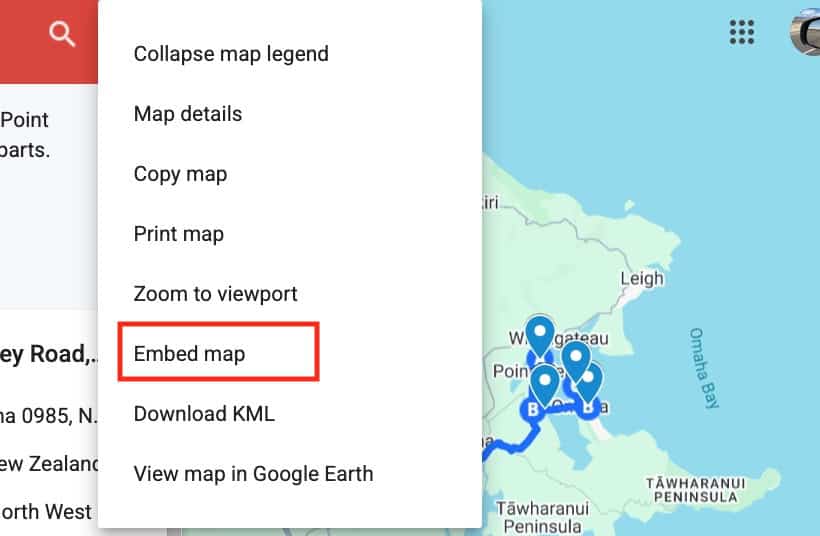
Then select Embed map, which generates an iframe embed code, so your trail map can appear as a live, interactive element right in the page.
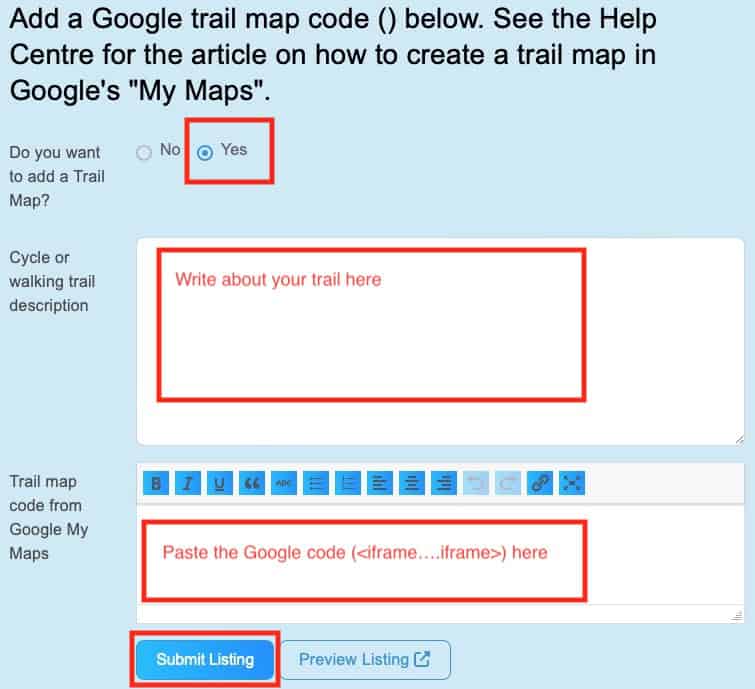
Finally, log in to Tripplanner.nz to:
- Click “Yes” to add a map
- Add a description of the trail
- Paste the embed code into the map embed field for your listing or trail page, and
- Click “Submit”
Congratulations! You’ve changed your simple trail description into an engaging, practical planning tool that adds real value for Tripplanner.nz users.
Author: Mike Fernandez
Hey! I've worked for Nection Ltd since 2018 and been writing for Tripplanner since late 2025. I love it that this is a place where people can tell everyone about where they're from and hopefully bring tourists in. I'm from Matakana (which is why there's so many listings from there!) I had fun making them, I hope you like them too.